This tutorial describes how to get Kinect 2 working on macOS with NiTE skeleton tracking. Tested on macOS 10.11, OpenFrameworks 0.9.3.
Thanks to George Profenza for his help in making Kinect 2 work on macOS.
- Install libfreenect2, make sure to install
OpenNI2, and compilelibfreenect2withopenni2support (usingmake install-openni2) - Downlad
NiTE2— I'm not sure about the official status of this library, so I'm not going to provide a link for now, but you should be able to find it easily if you google forNiTE-MacOSX-x64-2.2.tar.zip - When compiling
openni2I had to runcmakewith:-DENABLE_OPENGL=ON -DENABLE_CUDA=OFF(to disable CUDA) - Put
libfreenect2/build/lib/libfreenect2-openni2.0.dylibinNiTE-MacOSX-x64-2.2/Samples/Bin/OpenNI2/Drivers - You should be able to run one of the samples now, like
UserViewer: cd intoNiTE-MacOSX-x64-2.2/Samples/Binand run./UserViewer, this might fail if CUDA is not available, but I had luck running it with OpenCL backend, and you can always just run on CPU (LIBFREENECT2_PIPELINE=cl|cuda|cpu ./UserViewer)
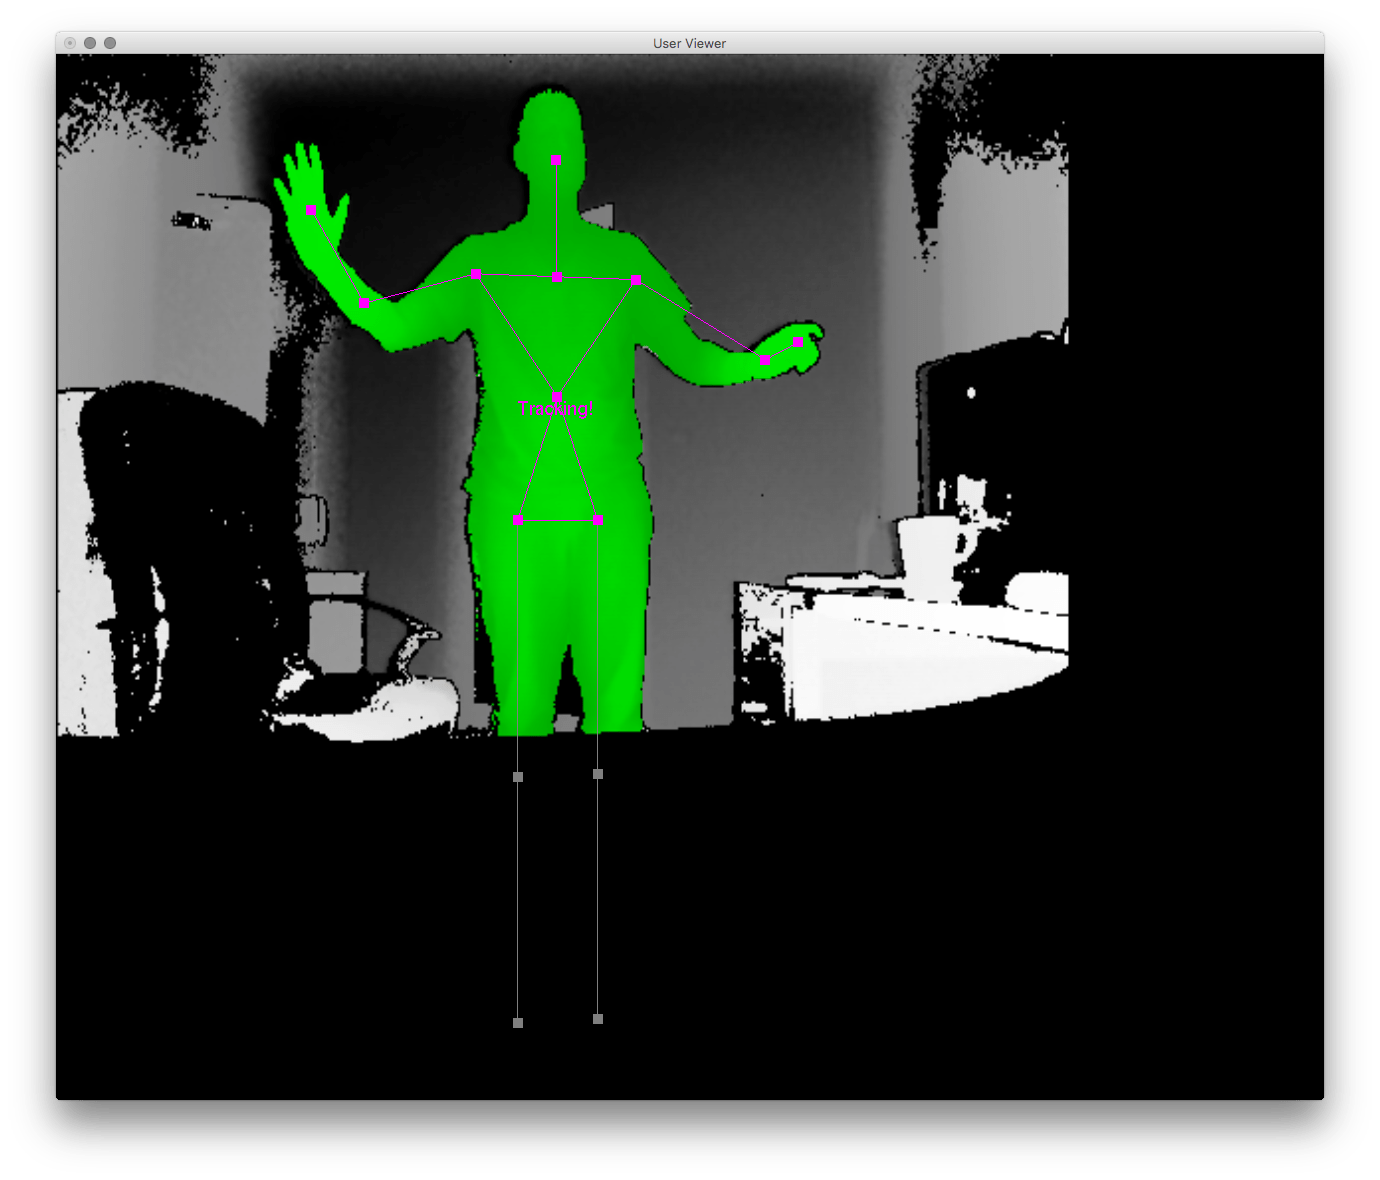
I couldn't find any OpenFrameworks addons that would work for me so here's how to use the libraries without any wrappers. Project setup is a bit complicated, but worth it.
- Create new project with OpenFrameworks
projectGenerator, add all other addons that you will need (and watch out, re-adding addons throughprojectGeneratorwill break all the other changes we will make!) -
Once Xcode is ready, create two new groups:
libsandincludes(arbitrary names), withNiTE2andOpenNIinside of each one: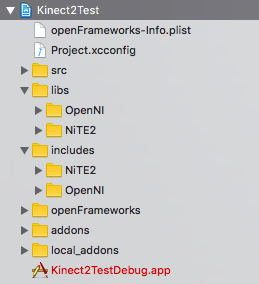
- Go to
NiTE-MacOSX-x64-2.2/Includeand drag all*.hfiles intoincludes/NiTE2group (no need to "copy items if needed", but remember to "add to targets") -
Go to
/usr/local/include/ni2/and drag all files and directories into theincludes/OpenNIgroup (no need to "copy items if needed", but remember to "add to targets")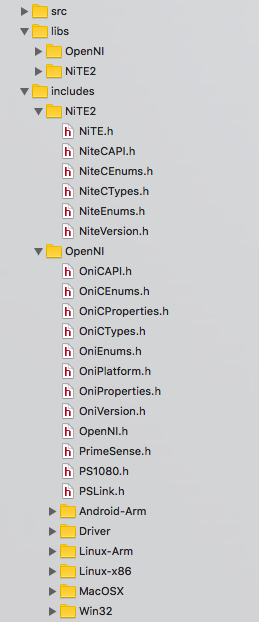
- Go to
NiTE-MacOSX-x64-2.2/Redistand drag all files into thelibs/NiTE2group (select "add to targets") -
Go to
NiTE-MacOSX-x64-2.2/Samples/Binand draglibOpenNI2.dylib,libOpenNI2.jni.dylib,OpenNI2/,org.openni.jarandOpenNI.iniintolibs/OpenNI2group (select "add to targets"), remember thatlibfreenect2-openni2.0.dylibshould be inOpenNI2/Driversgroup!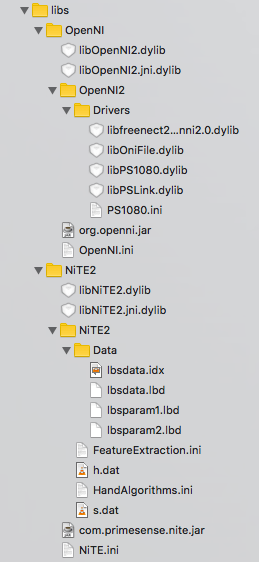
-
Go to "Build Phases" of the project, and clean up "Link Binary WIth Libraries": it should only contain
openFrameworksDebug.a,libOpenNI2.dylibandlibNiTE2.dylib
-
Go to "Build Setings" and setup "Library Search Paths" under "Target":
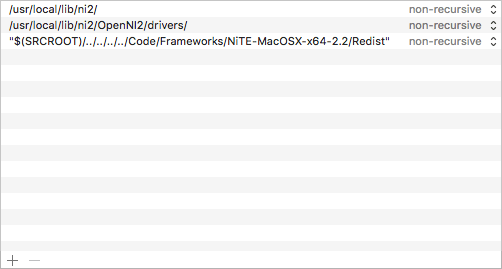
-
Go back to "Build Phases" and setup "Copy Files" (make sure that proper "Subpaths" are set):
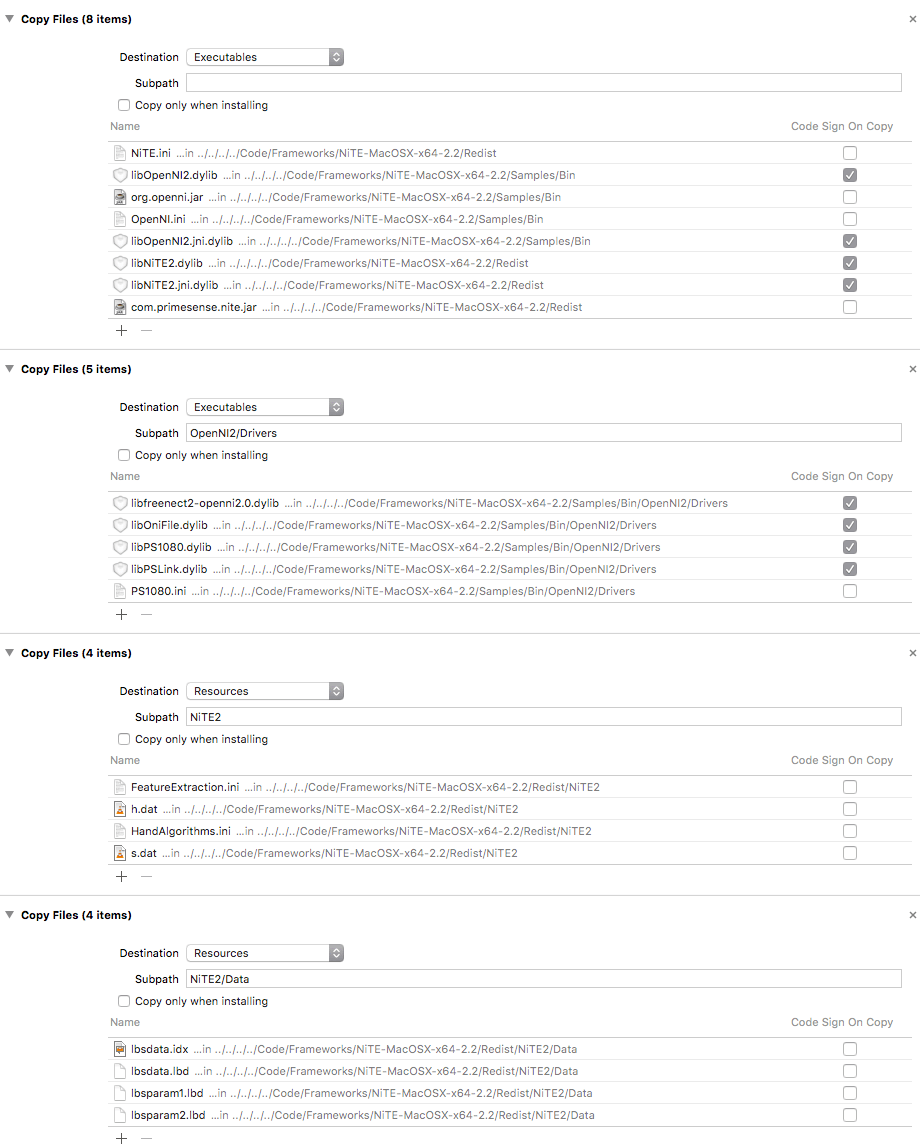
Now we should be able to add some NiTE code and get this to run!
Let's start with testing if NiTE is working, adding this to the ofApp.cpp:
#include "ofApp.h"
#include "NiTE.h"

void ofApp::setup() {
  nite::NiTE::initialize();

  nite::UserTracker userTracker;

  nite::Status niteRc = userTracker.create();

  if (niteRc != nite::STATUS_OK) {
    ofLogError() << "Couldn't create user tracker";
    return 1;
  }
  else {
    ofLogNotice() << "NiTE is working!";
  }
}
For different resource paths to work properly, we need to run the app from the Contents/MacOS directory, and we also have to specify LIBFREENECT2_PIPELINE variable, I'm usually setting up two bash scripts:
build.sh:
#!/usr/bin/env bash

xcodebuild -project *.xcodeproj -configuration Debug
run.sh (remember to change Kinect2TestDebug to your executable name):
#!/usr/bin/env bash

pushd ./bin/*.app/Contents/MacOS/
LIBFREENECT2_PIPELINE=cl ./Kinect2TestDebug
popd
We can now run ./build.sh && ./run.sh and if everything is ok, we should see "NiTE is working!" in the command line.
Now for the fun part, here's simple stick-figure code that you can treat as starting point (of course all library paths will be broken, so use just the src/* files, after setting up the project): szymonkaliski/of-exp-kinect2-nite-osx